The world is awash in color, a vibrant tapestry woven from the threads of nature. From the delicate blush of a rose petal to the deep, mysterious indigo of the night sky, color has the power to captivate and inspire. For centuries, humans have sought to capture and replicate these natural hues, and one of the most enduring methods has been the art of plant-based dyeing. In an era increasingly concerned with sustainability and environmental impact, the practice of using plant-based dyes is experiencing a remarkable resurgence. This comprehensive guide will delve into the fascinating world of plant-based dyes, exploring their history, the science behind them, and, most importantly, how you can implement them in your own creative endeavors.
A Journey Through Time: The History of Plant-Based Dyes
Before the advent of synthetic dyes in the mid-19th century, the world of color was almost entirely dependent on the bounty of the natural world. Our ancestors, driven by both necessity and a deep appreciation for beauty, developed sophisticated techniques for extracting color from plants, insects, and minerals. This knowledge was often passed down through generations, becoming deeply intertwined with cultural traditions and artistic practices.
The earliest evidence of plant-based dyeing dates back thousands of years. Archaeological discoveries have unearthed dyed textiles from ancient civilizations around the globe. In Mesopotamia, the use of madder root for producing vibrant reds was commonplace. In Egypt, the Egyptians were masters of dyeing, utilizing a range of plants to create colors for clothing, religious artifacts, and even mummy wrappings. The Greeks and Romans also embraced the art of dyeing, with dyes playing a significant role in their social and economic lives.
The Silk Road facilitated the exchange of knowledge and materials, leading to the spread of dyeing techniques and the introduction of new plant sources. The discovery of indigo, a plant native to India, revolutionized the textile industry, offering a deep, rich blue that was highly prized. In Europe, the cultivation of woad, a plant that also yields blue dye, became an important industry, though its color was considered less vibrant than indigo.
The arrival of the Spanish in the Americas introduced new sources of color, including cochineal, an insect that produces a brilliant red dye. This dye became a valuable commodity, transforming the European textile market. The history of plant-based dyeing is a testament to human ingenuity and our enduring fascination with color. It is a story of cultural exchange, scientific discovery, and artistic expression.
The Science Behind the Color: How Plant-Based Dyes Work
Understanding the science behind plant-based dyeing is key to achieving consistent and beautiful results. The process involves extracting color pigments from plants and then transferring those pigments to a fiber, such as cotton, wool, silk, or linen. These pigments are typically found in various parts of the plant, including the roots, leaves, flowers, bark, and fruits. The specific pigment responsible for the color can vary greatly depending on the plant species and the conditions in which it grows.
The pigments in plants are complex chemical compounds. Some of the most common types of pigments used in dyeing include:
- Anthraquinones: Found in plants like madder root, these pigments produce a range of reds, oranges, and pinks.
- Flavonoids: Present in many plants, flavonoids can create yellows, oranges, and browns.
- Indigo: Derived from plants like indigo and woad, indigo produces a deep blue color.
- Tannins: Found in barks and other plant parts, tannins can act as mordants, helping the dye bind to the fiber.
The dyeing process typically involves several steps:
- Preparation: The fiber must be prepared to accept the dye. This often involves washing the fiber to remove any oils or impurities that might interfere with the dyeing process.
- Mordanting: Mordanting is a crucial step that helps the dye bind to the fiber and makes the color more permanent. Mordants are typically metal salts, such as alum (potassium aluminum sulfate), which create a chemical bond between the dye and the fiber. Different mordants can also influence the final color.
- Dye Extraction: The plant material is typically simmered in water to extract the color pigments. The length of time and the temperature of the extraction process can affect the final color.
- Dyeing: The prepared fiber is then immersed in the dye bath, allowing the dye to penetrate the fibers. The temperature and duration of the dyeing process can also impact the final color.
- After-treatment: After dyeing, the fiber is often rinsed and sometimes treated with a finishing agent to improve colorfastness and durability.
The chemical reactions involved in plant-based dyeing are fascinating and complex. Understanding these processes can help you to troubleshoot any issues and to achieve the desired results. The science behind plant-based dyes is a testament to the power of nature and the ingenuity of those who have sought to harness its beauty.
Getting Started: Materials and Equipment You’ll Need
Embarking on your plant-based dyeing journey can be an incredibly rewarding experience. However, before you dive in, it’s essential to gather the necessary materials and equipment. Here’s a comprehensive list to get you started:
Essential Materials:
- Plant Material: This is the heart of the process! You can use a wide variety of plants, including:
- Roots: Madder, weld, and alkanet are popular choices.
- Leaves: Eucalyptus, spinach, and walnut leaves can produce color.
- Flowers: Marigolds, cosmos, and coreopsis offer vibrant hues.
- Bark: Oak bark, walnut hulls, and alder bark can be used.
- Fruits & Berries: Blackberries, blueberries, and avocado pits provide color.
- Fiber: Choose natural fibers such as cotton, linen, silk, wool, or hemp. Different fibers will absorb dyes differently, so it’s a good idea to experiment.
- Mordants: Alum (potassium aluminum sulfate) is a common mordant, but other options include iron sulfate (copperas), copper sulfate, and tin chloride.
- Water: Use clean, filtered water.
Equipment:
- Stainless Steel or Enamel Pots: Avoid using aluminum pots, as they can react with the mordants and dyes.
- Heat Source: A stovetop or a hot plate works well.
- Thermometer: To monitor the temperature of your dye baths.
- Measuring Cups and Spoons: For accurate measurements of mordants and other ingredients.
- Gloves: To protect your hands from mordants and dyes.
- Safety Glasses: To protect your eyes.
- Mask: To avoid inhaling fumes or dust.
- Stirring Utensils: Use separate utensils for mordanting and dyeing. Wooden spoons or stainless steel utensils are good choices.
- Containers for Soaking and Rinsing: Buckets or tubs are useful for preparing your fibers and rinsing them after dyeing.
- Scale: For accurately weighing your fiber and mordants.
- pH strips or meter (optional): To test the pH of your dye baths.
- Notebook and Pen: To record your experiments and results.
Safety First: Always work in a well-ventilated area. Read the safety data sheets (SDS) for all chemicals you are using, and follow the manufacturer’s instructions. Dispose of dye baths and mordant solutions responsibly, following local regulations.
Step-by-Step Guide: Dyeing with Plants
Now that you have your materials and equipment, let’s dive into the step-by-step process of plant-based dyeing. This guide provides a general overview. Remember that the specific methods and times may vary depending on the plant material, the fiber, and the desired color.
1. Fiber Preparation
Before you begin dyeing, it’s crucial to prepare your fiber. This process removes any oils, dirt, or finishes that might interfere with the dye absorption. Here’s how to prepare different types of fibers:
- Cotton and Linen: Wash the fiber thoroughly with hot water and a mild detergent. Rinse well and allow to dry.
- Wool and Silk: Wash gently with lukewarm water and a pH-neutral soap. Avoid harsh detergents, as they can damage the fibers. Rinse well and allow to dry.
2. Mordanting
Mordanting is a critical step that helps the dye bind to the fiber, resulting in more vibrant and permanent colors. Here’s how to mordant using alum, the most common mordant:
- Weigh your fiber.
- Calculate the amount of alum needed. A common ratio is 10-20% alum by weight of the fiber (WOF). For example, if you have 100 grams of fiber, you’ll need 10-20 grams of alum.
- Dissolve the alum in warm water. Use a non-reactive pot (stainless steel or enamel).
- Add the wet fiber to the alum solution. Make sure the fiber is fully submerged.
- Heat the solution to a simmer (around 180-190°F or 82-88°C) and maintain for 1 hour. Stir gently to ensure even mordanting.
- Allow the fiber to cool in the mordant bath.
- Rinse the fiber gently in cool water.
- The fiber is now ready for dyeing.
Important Note: Always wear gloves and eye protection when working with mordants.
3. Dye Extraction
The next step is to extract the color from your chosen plant material. Here’s how:
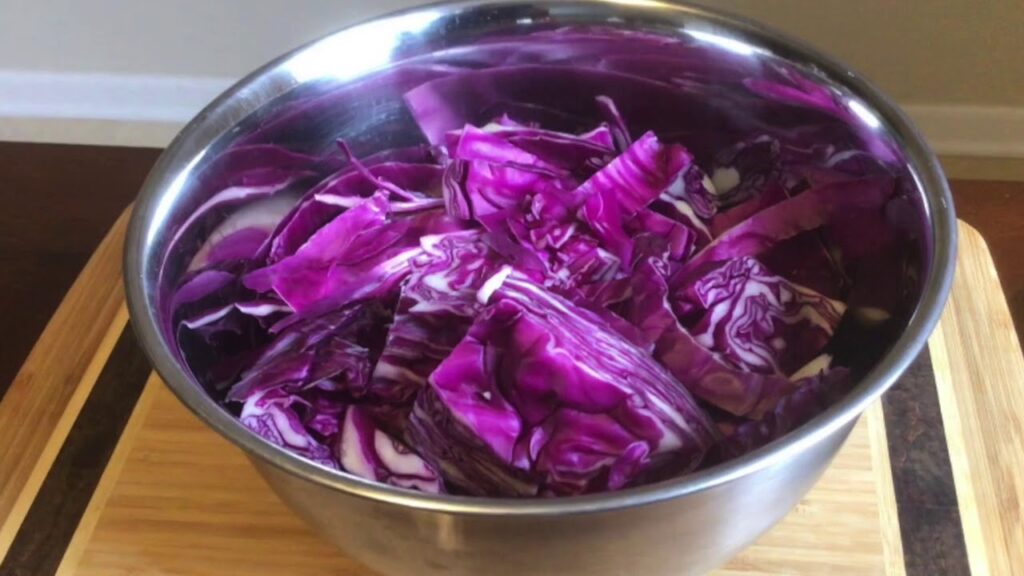
- Prepare your plant material. Chop or crush the plant material to help release the pigments.
- Place the plant material in a non-reactive pot.
- Add water, ensuring the plant material is fully submerged. The amount of water will depend on the amount of plant material and the desired concentration of the dye. A general guideline is to use a ratio of 1:4 (plant material to water).
- Heat the mixture to a simmer (around 180-190°F or 82-88°C) and maintain for 1-2 hours. Stir occasionally.
- Allow the dye bath to cool.
- Strain the dye bath to remove the plant material. You can use a cheesecloth, a fine-mesh sieve, or a coffee filter. The remaining liquid is your dye bath.
Tip: You can often re-use the plant material for a second extraction to get a lighter shade.
4. Dyeing the Fiber
Now it’s time to dye your prepared fiber:
- Add the wet, mordanted fiber to the dye bath. Ensure the fiber is fully submerged.
- Gently heat the dye bath to a simmer (around 180-190°F or 82-88°C) and maintain for 1 hour. Stir occasionally to ensure even dyeing.
- Allow the fiber to cool in the dye bath. The longer the fiber sits in the dye bath, the deeper the color will be. You can leave it overnight for a more intense shade.
- Remove the fiber from the dye bath and rinse it thoroughly in cool water until the water runs clear.
- Allow the dyed fiber to dry in a shaded area, away from direct sunlight.
5. After-Treatment (Optional)
After dyeing, you can improve the colorfastness and durability of your dyed fiber by:
- Washing: Wash the dyed fiber gently with a pH-neutral soap and cool water. Avoid harsh detergents and hot water, as they can fade the color.
- Color Fixatives: Use a color fixative, such as a commercial dye fixative or a solution of salt, to help lock in the color.
Congratulations! You have now successfully dyed your fiber using plant-based dyes. Enjoy the beautiful colors you have created.
Exploring Different Plant Sources: A Rainbow of Possibilities
One of the most exciting aspects of plant-based dyeing is the vast array of colors you can achieve from a wide variety of plants. Here’s a glimpse into some popular plant sources and the colors they produce:
- Yellows:
- Marigold Flowers: Yields vibrant yellows and oranges.
- Goldenrod: Produces a rich yellow.
- Turmeric: Creates a bright, sunny yellow.
- Weld: Gives a strong yellow.
- Reds and Oranges:
- Madder Root: Produces a range of reds, from pale pinks to deep crimsons.
- Cochineal: Creates brilliant reds and pinks.
- Avocado Pits: Can produce beautiful pinks and peaches.
- Annatto Seeds: Results in a warm orange.
- Blues and Greens:
- Indigo: Creates a deep, rich blue.
- Woad: Produces a lighter blue.
- Eucalyptus Leaves: Can yield shades of green and yellow-green.
- Browns and Tans:
- Walnut Hulls: Produces rich browns.
- Oak Bark: Creates shades of brown and tan.
- Black Tea: Gives a warm brown.
- Coffee Grounds: Provides a range of browns and tans.
- Purples:
- Blackberries: Can produce beautiful purples and lavenders.
- Logwood: Yields purples and blacks.
Experimentation is Key: Remember that the final color can be influenced by several factors, including the plant material, the mordant used, the pH of the dye bath, and the fiber type. Don’t be afraid to experiment with different combinations to discover unique and unexpected colors.
Troubleshooting Common Issues and Tips for Success
Plant-based dyeing, while rewarding, can sometimes present challenges. Here are some common issues and tips to help you achieve success:
- Weak Color:
- Problem: The color is not as vibrant as you expected.
- Possible Solutions:
- Use more plant material.
- Increase the dyeing time.
- Make sure your mordanting process was effective.
- Check the pH of your dye bath; some dyes work best in specific pH ranges.
- Uneven Dyeing:
- Problem: The color is patchy or uneven.
- Possible Solutions:
- Stir the fiber frequently during the dyeing process.
- Ensure the fiber is fully submerged in the dye bath.
- Avoid overcrowding the dye pot.
- Pre-soak fibers in water before dyeing.
- Fading:
- Problem: The color fades after washing or exposure to sunlight.
- Possible Solutions:
- Use a mordant to help the dye bind to the fiber.
- Wash the dyed fiber gently with a pH-neutral soap and cool water.
- Avoid prolonged exposure to direct sunlight.
- Consider using a color fixative.
- Color Changes:
- Problem: The color changes unexpectedly.
- Possible Solutions:
- The pH of the dye bath can affect the final color. Test the pH and adjust if necessary.
- Different mordants can influence the color. Experiment with different mordants to see how they affect the final result.
- The plant material itself can vary in color intensity depending on the season and growing conditions.
Tips for Success:
- Keep Detailed Records: Document your processes, including the plant material, mordant, fiber type, dye bath pH, and dyeing times. This will help you replicate successful results and troubleshoot any issues.
- Start Small: Begin with small batches to experiment and refine your techniques.
- Be Patient: Plant-based dyeing can be a slow process. Allow plenty of time for each step.
- Embrace Imperfection: Plant-based dyes often yield unique and subtle variations in color. These imperfections are part of the beauty of natural dyeing.
- Source Sustainably: Choose plant materials that are locally available and grown sustainably. Consider foraging responsibly or growing your own dye plants.
The Environmental and Ethical Advantages of Plant-Based Dyes
In a world grappling with the environmental consequences of industrial processes, the practice of plant-based dyeing offers a compelling alternative. The advantages of using plant-based dyes extend far beyond the beautiful colors they produce.
- Reduced Environmental Impact:
- Biodegradable: Plant-based dyes are biodegradable and do not contribute to the pollution caused by synthetic dyes.
- Renewable Resources: Plant-based dyes are derived from renewable resources, unlike synthetic dyes, which often rely on petroleum-based chemicals.
- Lower Water Usage: While dyeing requires water, the process can be optimized to minimize water consumption.
- Reduced Chemical Waste: Plant-based dyeing eliminates the use of harsh chemicals, reducing the amount of chemical waste released into the environment.
- Health Benefits:
- Non-Toxic: Plant-based dyes are generally non-toxic and safe for human health, unlike some synthetic dyes, which can contain harmful chemicals.
- Gentle on the Skin: Textiles dyed with plant-based dyes are often gentler on the skin, making them a good choice for sensitive individuals.
- Ethical Considerations:
- Supports Sustainable Practices: Plant-based dyeing encourages sustainable agricultural practices and the responsible use of natural resources.
- Promotes Local Economies: Sourcing plant materials locally can support local farmers and communities.
- Preserves Traditional Crafts: The practice of plant-based dyeing helps to preserve traditional dyeing techniques and cultural heritage.
By choosing plant-based dyes, you are not only creating beautiful and unique textiles but also making a conscious choice to support a more sustainable and ethical approach to color.
Beyond the Basics: Advanced Techniques and Further Exploration
Once you’ve mastered the basics of plant-based dyeing, there’s a whole world of advanced techniques and creative possibilities to explore.
- Bundle Dyeing: This technique involves wrapping plant material directly onto the fabric and steaming it to transfer the color. It creates unique patterns and effects.
- Shibori Dyeing: This Japanese dyeing technique involves folding, clamping, or stitching the fabric to create resist patterns.
- Eco-Printing: This technique uses the natural shapes and textures of leaves and flowers to create prints on fabric.
- Over-dyeing: Dyeing a fabric multiple times with different colors can create complex and layered effects.
- Color Blending: Mixing different dye baths can create a wider range of colors.
- Exploring Different Mordants: Experimenting with different mordants, such as iron, copper, and tin, can dramatically alter the final colors.
- Natural Dye Kits: Consider purchasing pre-made natural dye kits to simplify the process and gain inspiration.
- Join a Community: Connect with other natural dyers through online forums, workshops, and local groups. Sharing knowledge and experiences can be invaluable.
The possibilities for creativity and experimentation in plant-based dyeing are virtually endless. By exploring these advanced techniques, you can push the boundaries of your skills and create truly unique and stunning works of art.
Conclusion: Embracing the Beauty of Nature’s Palette
Plant-based dyeing is more than just a craft; it’s a connection to the natural world, a celebration of beauty, and a commitment to sustainability. From the ancient roots of the practice to the modern-day resurgence, plant-based dyeing offers a rich and rewarding experience for anyone seeking to create beautiful and environmentally conscious textiles.
By embracing the methods outlined in this guide, you can embark on your own journey into the world of plant-based dyes. Experiment with different plants, fibers, and techniques. Don’t be afraid to make mistakes; they are often the most valuable learning experiences. With patience, curiosity, and a deep appreciation for the beauty of nature, you can unlock the secrets of nature’s palette and create textiles that are not only beautiful but also tell a story of sustainability, creativity, and a deep connection to the natural world.
So, gather your materials, embrace the process, and prepare to be amazed by the vibrant colors that nature has to offer. Happy dyeing!


