The buzz of bees, the flutter of butterflies, the flash of a hummingbird’s wings – these are the sights and sounds of a thriving ecosystem. And at the heart of this vibrant world lies the crucial role of native pollinators. Beyond simply enjoying the beauty they bring, understanding how to attract these vital creatures is paramount, especially when it comes to seed production. This article will delve deep into the fascinating world of pollinators, exploring why they are so essential, how you can create a welcoming habitat, and the specific plants that will have them flocking to your garden or farm. We’ll also touch on the challenges they face and the simple yet impactful steps we can all take to ensure their survival and the continued bounty of our crops.
The Indispensable Role of Native Pollinators
Before we dive into the ‘how,’ let’s address the ‘why.’ Why should we care about attracting native pollinators? The answer is multifaceted and deeply intertwined with the health of our planet and the sustainability of our food systems.
The Pollination Process: A Natural Marvel
Pollination is, at its core, a fundamental biological process. It’s the transfer of pollen from the male part of a flower (the stamen) to the female part (the pistil), enabling fertilization and the subsequent production of seeds and fruits. While some plants can self-pollinate or rely on wind or water for pollination, a vast majority – including many of our food crops – depend on the tireless work of pollinators.
Why Native Pollinators Matter More Than You Think
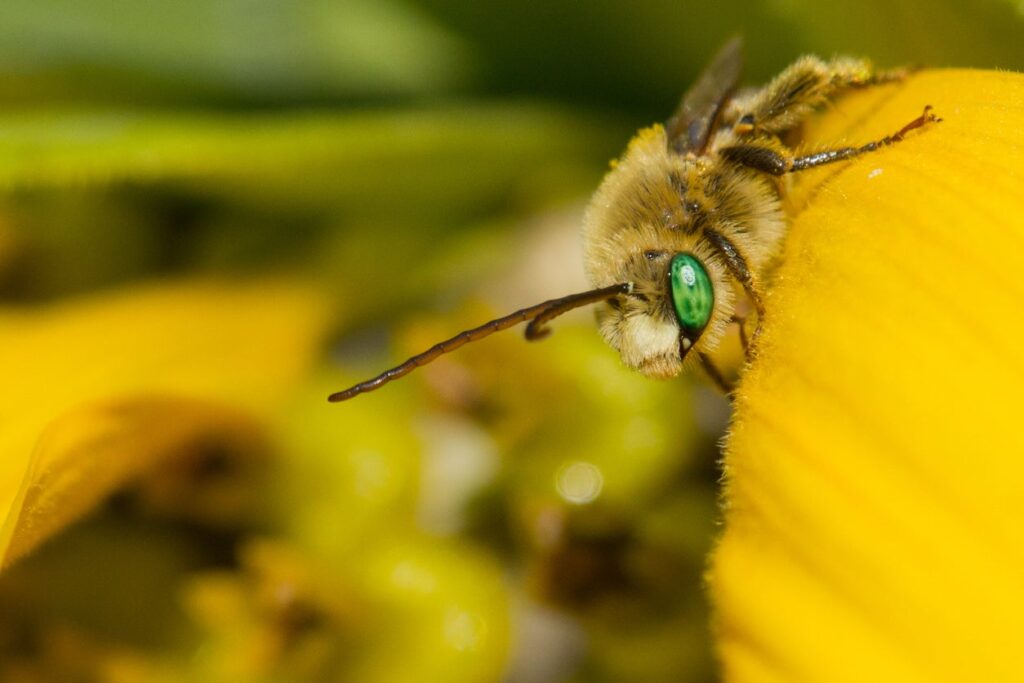
Native pollinators, which include bees (honeybees, bumblebees, and a vast array of solitary bees), butterflies, moths, beetles, hummingbirds, and even some bats, have co-evolved with the plants in their specific ecosystems. This co-evolution has resulted in a highly efficient and specialized pollination process. Native pollinators are often better adapted to the local climate and plant species, making them more effective pollinators than introduced species in many cases. This efficiency translates directly into higher seed yields, better fruit quality, and increased biodiversity.
Consider the humble tomato. While honeybees can pollinate tomatoes, native bumblebees are often far more efficient because of their ability to perform ‘buzz pollination,’ a technique that shakes the pollen loose from the flower. Or think about the delicate dance between a hummingbird and a scarlet bee balm. These relationships are finely tuned, and the loss of one can have cascading effects on the other.
The Economic Impact: Food on Our Tables and Dollars in Our Pockets
The economic value of pollination services provided by insects and other animals is staggering. It’s estimated to be in the billions of dollars annually worldwide. This includes the pollination of crops like fruits, vegetables, nuts, and seeds. Without pollinators, our food supply would be significantly reduced, and the cost of food would skyrocket. Farmers and gardeners alike rely on pollinators for their livelihoods, and the health of pollinator populations is directly linked to their financial success.
Creating a Pollinator-Friendly Habitat: A Blueprint for Success
Attracting native pollinators isn’t just about planting a few flowers; it’s about creating a complete ecosystem that provides everything these creatures need to thrive. This includes food, water, shelter, and a safe environment free from harmful pesticides.
Planting a Diverse Range of Native Plants
This is perhaps the most crucial step. Native plants are the foundation of a pollinator-friendly habitat. They have evolved alongside local pollinators, providing the nectar and pollen that these creatures need for sustenance. Furthermore, native plants are often better adapted to the local climate and soil conditions, making them easier to care for and more resilient to pests and diseases. When selecting plants, consider the following:
- Variety is Key: Plant a diverse range of species that bloom at different times of the year. This will ensure a continuous supply of food for pollinators throughout the growing season.
- Choose Native Species: Prioritize plants that are native to your region. Local nurseries and online resources can help you identify the best choices for your area.
- Consider Bloom Time: Include plants with early-blooming, mid-season, and late-blooming flowers to provide a consistent food source.
- Sun and Shade: Plant a mix of sun-loving and shade-tolerant species to cater to the needs of different pollinators and create a variety of microhabitats.
- Flower Shape and Color: Different pollinators are attracted to different flower shapes and colors. Include a variety of flower types, such as tubular flowers (for hummingbirds), flat flowers (for butterflies), and composite flowers (for bees).
Pro Tip: Avoid planting overly hybridized varieties, as they may have reduced nectar or pollen production compared to their wild counterparts.
Providing a Constant Water Source
Pollinators need water to drink, regulate their body temperature, and dilute nectar. Providing a reliable water source is essential, especially during hot and dry periods. Here are some options:
- Bird Baths: A shallow bird bath with a few pebbles or stones for the pollinators to perch on is an excellent option.
- Puddling Areas: Create a shallow puddle in a sunny spot by burying a shallow dish and filling it with water. Add sand or small stones to provide a landing area.
- Watering Can: Gently water the foliage of plants in the morning, allowing the water to collect on the leaves.
- Dripping Faucet: If you have a dripping faucet, consider placing a shallow dish underneath to collect the water.
Important: Change the water frequently to prevent the growth of algae and mosquitoes.
Creating Shelter and Nesting Sites
Pollinators need shelter from the elements and safe places to raise their young. Providing suitable nesting sites is particularly crucial for solitary bees, which make up the majority of bee species. Here are some ways to provide shelter:
- Leave Some Areas Untouched: Resist the urge to tidy up your garden too much. Leave patches of bare ground, leaf litter, and standing dead wood, as these provide nesting sites and overwintering habitat for many pollinators.
- Bee Hotels: Build or purchase a bee hotel, which provides nesting cavities for solitary bees. These can be made from bamboo canes, drilled wooden blocks, or other materials.
- Brush Piles: Create a brush pile from twigs and branches to provide shelter for various insects and other wildlife.
- Reduce Lawn Areas: Lawns offer little in the way of habitat for pollinators. Consider reducing the size of your lawn and replacing it with native plants.
Avoiding Pesticides and Herbicides
Pesticides and herbicides can be incredibly harmful to pollinators. Even seemingly harmless pesticides can have devastating effects, killing bees, butterflies, and other beneficial insects. The use of these chemicals should be avoided at all costs.
- Choose Organic Gardening Practices: Embrace organic gardening methods, which focus on building healthy soil, using natural pest control methods, and avoiding synthetic chemicals.
- Identify Pests Before Treating: Before taking any action, accurately identify the pest that is causing damage. This will help you choose the most effective and least harmful control method.
- Use Natural Pest Control Methods: Employ natural pest control methods, such as handpicking pests, introducing beneficial insects (like ladybugs and lacewings), and using insecticidal soap or horticultural oil when necessary.
- Read Labels Carefully: If you must use a pesticide, carefully read and follow the label instructions. Choose the least toxic option and apply it at the recommended time to minimize harm to pollinators.
Plant Selection: The Pollinator’s Menu
Choosing the right plants is the cornerstone of attracting native pollinators. Here are some plant recommendations, categorized by pollinator type, along with tips for incorporating them into your garden or farm:
Bees
Bees are the workhorses of pollination, and they are attracted to a wide variety of flowers. Here are some bee-friendly plant choices:
- Wildflowers: Coreopsis, coneflowers, sunflowers, bee balm, goldenrod, asters.
- Herbs: Lavender, rosemary, thyme, oregano, mint.
- Shrubs: Lavender, rosemary, thyme, oregano, mint.
- Trees: Fruit trees (apple, cherry, plum), willow, basswood.
Tips for Bee-Friendly Planting:
- Plant in clumps or drifts to make it easier for bees to find and forage on the flowers.
- Choose a mix of colors and bloom times to attract a variety of bee species throughout the season.
- Provide a sunny location, as bees prefer to forage in warm, sunny conditions.
Butterflies and Moths
Butterflies and moths are attracted to flowers with bright colors and sweet nectar. Their larvae (caterpillars) often have specific host plants that they feed on. Here are some butterfly- and moth-friendly plants:
- Wildflowers: Milkweed (essential for monarch butterflies), butterfly bush (use with caution, as it can be invasive in some areas), coneflowers, zinnias, cosmos.
- Herbs: Dill, parsley, fennel.
- Shrubs: Butterfly bush, buddleia, lantana.
- Trees: Willow, dogwood.
Tips for Butterfly and Moth-Friendly Planting:
- Plant a variety of host plants to provide food for butterfly and moth larvae.
- Provide a sunny location with shelter from strong winds.
- Include plants with different bloom times to attract butterflies and moths throughout the season.
Hummingbirds
Hummingbirds are attracted to tubular flowers with bright colors, particularly red and orange. Here are some hummingbird-friendly plants:
- Wildflowers: Bee balm, cardinal flower, columbine, salvia.
- Vines: Trumpet vine, honeysuckle.
- Shrubs: Butterfly bush, fuchsia.
Tips for Hummingbird-Friendly Planting:
- Plant in a sunny location with shelter from strong winds.
- Provide a red or orange feeder with sugar water (a 4:1 water-to-sugar ratio).
- Avoid using pesticides, as they can harm hummingbirds and the insects they feed on.
Beyond the Garden: Supporting Pollinators on a Larger Scale
While creating a pollinator-friendly garden is a great start, there are other steps we can take to support pollinators on a larger scale and contribute to seed production efforts.
Supporting Local Farms and Seed Producers
By supporting local farms and seed producers who prioritize pollinator health, you can help create a demand for sustainable agricultural practices. Look for farms that:
- Use Organic or Sustainable Farming Practices: These practices minimize the use of pesticides and herbicides.
- Plant Cover Crops: Cover crops provide habitat and food for pollinators.
- Maintain Hedgerows and Windbreaks: These features provide shelter and nesting sites.
Advocating for Pollinator Conservation
Contact your elected officials to advocate for policies that protect pollinators, such as:
- Restricting the Use of Harmful Pesticides: Advocate for regulations that limit the use of neonicotinoids and other pesticides that are known to harm pollinators.
- Protecting Habitat: Support efforts to protect and restore pollinator habitat, such as grasslands, meadows, and forests.
- Funding Research and Education: Advocate for funding for research on pollinator health and education programs that teach people about the importance of pollinators.
Spreading Awareness
Educate your friends, family, and community about the importance of pollinators and the simple steps they can take to help. Share information on social media, write articles for your local newspaper, or give presentations at community events. Every little bit helps.
Challenges Facing Native Pollinators
Despite their essential role, native pollinators face numerous threats that are causing their populations to decline. Understanding these challenges is crucial for implementing effective conservation strategies.
Habitat Loss and Fragmentation
Habitat loss and fragmentation are major threats to pollinator populations. As natural habitats are converted to agriculture, urban development, and other uses, pollinators lose their food sources, nesting sites, and shelter. Habitat fragmentation, where large areas of habitat are broken up into smaller, isolated patches, can make it difficult for pollinators to find mates and access resources.
Pesticide Use
The widespread use of pesticides, particularly neonicotinoids, is a significant threat to pollinators. These insecticides can kill bees and other beneficial insects directly or indirectly by contaminating their food sources and nesting sites. Pesticides can also weaken pollinators, making them more susceptible to diseases and other stressors.
Climate Change
Climate change is altering the timing of plant blooms, which can disrupt the synchrony between pollinators and their food sources. Changes in temperature and precipitation patterns can also stress pollinators and make them more vulnerable to diseases and other threats.
Disease and Parasites
Pollinators are susceptible to a variety of diseases and parasites. These can weaken pollinators, reduce their lifespan, and make them less effective at pollination. The spread of diseases and parasites can be exacerbated by habitat loss, pesticide use, and climate change.
Lack of Genetic Diversity
Inbreeding and a lack of genetic diversity can make pollinator populations more susceptible to diseases and environmental stressors. This is particularly true for managed honeybee populations, which are often used for pollination in agricultural settings.
The Benefits of Prioritizing Seed Production with Pollinators in Mind
Focusing on native pollinators isn’t just an environmental imperative; it’s also a smart agricultural strategy. By prioritizing pollinator health during seed production, you can realize several significant benefits:
Increased Seed Yields and Quality
Native pollinators are often more efficient at pollinating local plants, leading to higher seed yields and improved seed quality. This translates to increased profits for farmers and gardeners.
Reduced Reliance on Pollination Services
By attracting and supporting native pollinators, you can reduce your reliance on managed honeybees, which can be expensive and may not be as effective as native pollinators in some cases.
Enhanced Ecosystem Health
Supporting native pollinators contributes to overall ecosystem health and biodiversity. Healthy ecosystems are more resilient to pests, diseases, and climate change.
Improved Crop Resilience
A diverse pollinator community can help to ensure that your crops are well-pollinated, even if some pollinators are affected by disease or environmental stressors.
Taking Action: A Call to Arms for Pollinator Conservation
The decline of native pollinators is a serious issue, but it’s not too late to take action. By creating pollinator-friendly habitats, supporting sustainable agricultural practices, and advocating for pollinator conservation, we can help to ensure the survival of these vital creatures and the continued bounty of our crops. Every action, no matter how small, makes a difference. Start today by planting a few native plants, avoiding pesticides, and spreading the word about the importance of pollinators. Together, we can create a world where pollinators thrive, and our food systems are secure.
The future of seed production and the health of our ecosystems depend on our commitment to protecting and supporting these essential creatures. Let’s work together to create a pollinator paradise, one garden, one farm, and one community at a time.