Introduction: Digging into the Roots of Well-being
In today’s fast-paced world, finding moments of peace and tranquility can feel like an uphill battle. We’re constantly bombarded with stimuli, from the incessant notifications on our phones to the demands of work and family life. It’s no wonder that stress and anxiety are on the rise. But what if I told you that there’s a simple, accessible, and profoundly effective way to nurture your mental well-being? Enter: gardening.
Gardening, more than just a hobby, is a powerful tool for cultivating calm and fostering a sense of connection with nature. It’s an activity that engages the senses, grounds us in the present moment, and offers a tangible sense of accomplishment. From the simple act of planting a seed to the satisfaction of harvesting your own vegetables, gardening provides a wealth of benefits for our mental and emotional health.
This comprehensive guide will delve into the myriad ways that gardening can enhance your mental well-being. We’ll explore the science behind the therapeutic effects of nature, offer practical tips for starting your own garden, and provide inspiration for incorporating gardening into your daily life. So, grab your gardening gloves and let’s dig in!
The Science of Serenity: How Nature Nurtures Our Minds
The connection between nature and well-being is not just anecdotal; it’s supported by a growing body of scientific evidence. Studies have shown that spending time in nature can lower stress hormones, reduce blood pressure, and boost the immune system. But how does gardening specifically contribute to these benefits?
The Biophilia Hypothesis: Our Innate Connection to Nature
The biophilia hypothesis, proposed by biologist E.O. Wilson, suggests that humans have an innate affinity for the natural world. We are drawn to nature because our survival depended on it for millennia. This inherent connection explains why we feel a sense of peace and restoration when we are surrounded by plants, trees, and other natural elements.
Gardening allows us to tap into this biophilic connection in a tangible way. By tending to plants, we are engaging in an activity that is deeply rooted in our evolutionary history. This can evoke feelings of comfort, security, and belonging, all of which are essential for mental well-being.
The Stress-Reducing Power of the Soil
Believe it or not, the soil beneath our feet is teeming with life, including beneficial bacteria that can have a profound impact on our mental health. *Mycobacterium vaccae*, a bacterium found in soil, has been shown to stimulate the release of serotonin in the brain. Serotonin is a neurotransmitter that plays a crucial role in regulating mood, sleep, and appetite.
Exposure to *Mycobacterium vaccae* through gardening can act as a natural antidepressant, helping to alleviate symptoms of anxiety and depression. The simple act of digging in the dirt can literally lift your spirits!
The Mindfulness of Gardening: Being Present in the Moment
In our increasingly digital world, it’s easy to get caught up in the whirlwind of thoughts and distractions. Gardening offers a welcome respite from this mental clutter, encouraging us to be present in the moment.
When we are gardening, we are focused on the task at hand: planting seeds, watering plants, weeding, and observing the growth process. This focused attention allows us to quiet our minds and tune into the sensory experience of gardening – the feel of the soil in our hands, the smell of the earth, the sight of vibrant colors, and the sound of birds singing.
Gardening, in essence, is a form of mindfulness practice. It cultivates awareness, reduces rumination, and promotes a sense of calm and centeredness.
Sprouting a Garden: Practical Tips for Beginners
Feeling inspired to start your own garden? Here are some practical tips to help you get started, regardless of your experience level or available space:
Start Small: Container Gardening for Beginners
Don’t feel like you need acres of land to reap the benefits of gardening. Container gardening is a perfect option for beginners, apartment dwellers, or anyone with limited space. You can grow a wide variety of plants in containers, from herbs and vegetables to flowers and small trees.
Choose containers that are appropriate for the size of the plants you want to grow. Make sure they have drainage holes to prevent waterlogging. Use a high-quality potting mix that provides good drainage and aeration. Place your containers in a sunny location that receives at least six hours of sunlight per day.
Choose the Right Plants: Consider Your Climate and Soil
Before you start planting, research which plants are best suited for your climate and soil conditions. Consider your region’s growing season, average rainfall, and temperature fluctuations. Conduct a soil test to determine its pH level and nutrient content. This information will help you choose plants that will thrive in your garden.
Local nurseries and garden centers are excellent resources for finding plants that are well-suited to your area. They can also provide valuable advice on planting and care.
Embrace the Process: Gardening is a Journey, Not a Destination
Gardening is not about perfection; it’s about the process of learning, growing, and connecting with nature. Don’t be discouraged if your plants don’t always thrive or if you encounter challenges along the way. Gardening is a continuous learning experience.
Embrace the mistakes, learn from them, and enjoy the journey. The rewards of gardening, both tangible and intangible, are well worth the effort.
Essential Gardening Tools for Beginners
* Gardening Gloves: Protect your hands from dirt, thorns, and potential irritants.
* Trowel: A small hand tool for digging, planting, and transplanting.
* Hand Rake: For smoothing soil and collecting debris.
* Watering Can or Hose: For providing essential hydration to your plants.
* Pruning Shears: For trimming and shaping plants.
* Soil Test Kit: To assess the pH and nutrient levels of your soil.
Understanding Soil Types
* Sandy Soil: Well-draining but doesn’t retain nutrients well.
* Clay Soil: Retains water and nutrients but can be poorly draining.
* Silty Soil: Smooth and fertile, with good water retention.
* Loamy Soil: An ideal mix of sand, silt, and clay, providing good drainage and fertility.
Cultivating Mindfulness in the Garden: Sensory Experiences
Gardening provides a wonderful opportunity to engage your senses and cultivate mindfulness. Here are some ways to enhance your sensory experience in the garden:
Sight: Observe the Beauty of Nature
Take time to observe the colors, shapes, and textures of the plants in your garden. Notice the way the sunlight filters through the leaves, the intricate patterns of the flowers, and the movement of the wind. Appreciate the beauty of nature in all its glory.
Smell: Inhale the Aromas of the Garden
The garden is filled with a symphony of scents, from the sweet fragrance of roses to the earthy aroma of freshly turned soil. Take deep breaths and savor the aromas of the garden. Certain scents, such as lavender and rosemary, have been shown to have calming and stress-reducing effects.
Touch: Connect with the Earth
Feel the texture of the soil in your hands, the smoothness of the leaves, and the coolness of the water. Connect with the earth through touch and allow yourself to be grounded in the present moment.
Sound: Listen to the Sounds of Nature
The garden is a sanctuary of sounds, from the chirping of birds to the buzzing of bees and the rustling of leaves. Close your eyes and listen to the symphony of nature. These sounds can be incredibly soothing and restorative.
Taste: Harvest the Fruits of Your Labor
If you are growing edible plants, enjoy the fruits (or vegetables) of your labor. There’s nothing quite like the taste of a freshly picked tomato or a sprig of homegrown herbs. Savor the flavors of your garden and appreciate the connection between food and nature.
Gardening for Specific Mental Health Challenges
Gardening can be a valuable tool for addressing a variety of mental health challenges. Here are some specific ways that gardening can help:
Gardening for Anxiety
The repetitive and grounding nature of gardening can be particularly helpful for managing anxiety. The act of focusing on a task, such as weeding or planting, can help to quiet racing thoughts and reduce feelings of overwhelm. The sensory experience of gardening can also be calming and restorative.
Gardening for Depression
Gardening can provide a sense of purpose and accomplishment, which can be especially beneficial for individuals struggling with depression. The act of nurturing plants and watching them grow can be incredibly rewarding. Additionally, exposure to sunlight and fresh air can boost mood and energy levels.
Gardening for PTSD
Gardening can be a safe and empowering activity for individuals with PTSD. It allows them to regain a sense of control over their environment and to connect with nature in a positive way. The sensory experience of gardening can also help to ground them in the present moment and reduce feelings of dissociation.
Gardening for Cognitive Function
Gardening involves a variety of cognitive skills, such as planning, problem-solving, and memory. Engaging in these activities can help to improve cognitive function and slow down age-related decline. Studies have also shown that gardening can reduce the risk of dementia.
Creating a Therapeutic Garden Space
Transforming your garden into a therapeutic space can further enhance its benefits for mental well-being. Here are some tips for creating a garden that promotes relaxation, mindfulness, and healing:
Choose Calming Colors
Incorporate plants with calming colors, such as blues, greens, and purples. These colors have been shown to have a soothing effect on the mind and body.
Create a Sense of Privacy
Use hedges, fences, or trellises to create a sense of privacy and enclosure. This will help you feel more safe and secure in your garden.
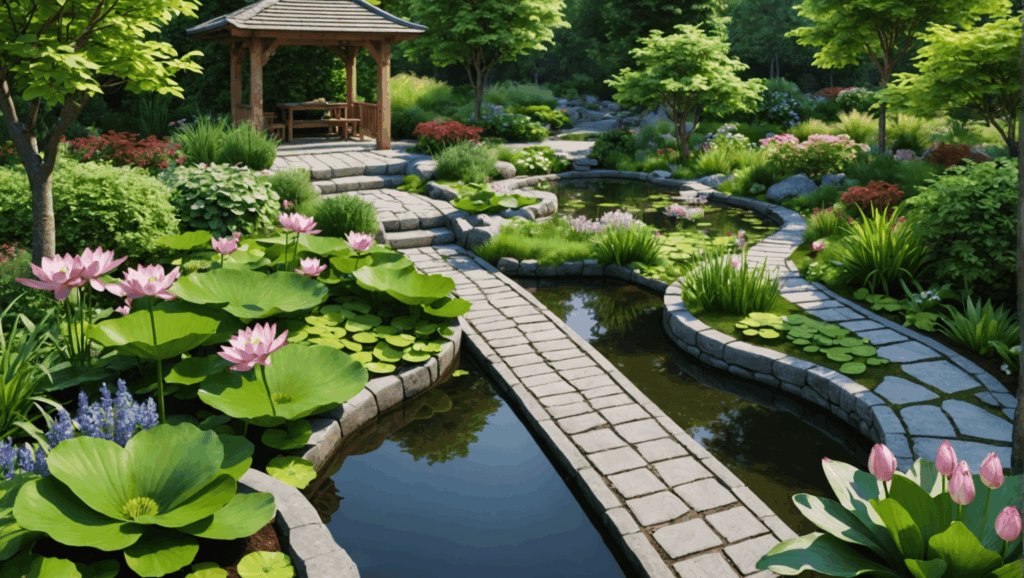
Add Water Features
Water features, such as fountains or ponds, can add a sense of tranquility to your garden. The sound of running water can be incredibly relaxing and meditative.
Incorporate Comfortable Seating
Create a comfortable seating area where you can relax and enjoy your garden. Add cushions, blankets, and pillows to make the space even more inviting.
Add Wind Chimes or Other Sound Elements
Wind chimes or other sound elements can add a sense of whimsy and serenity to your garden. Choose sounds that you find calming and enjoyable.
The Social Benefits of Gardening
Gardening can also be a social activity, providing opportunities to connect with others and build community. Joining a gardening club, volunteering at a community garden, or simply sharing your harvest with neighbors can foster a sense of belonging and connection.
Community Gardens
Community gardens are shared spaces where individuals can grow their own food and flowers. They provide a sense of community, promote healthy eating, and offer opportunities for social interaction.
Gardening Clubs
Gardening clubs are groups of people who share a passion for gardening. They meet regularly to share tips, exchange plants, and learn from each other.
Sharing Your Harvest
Sharing your harvest with neighbors, friends, and family is a wonderful way to spread the joy of gardening and build relationships. It’s also a great way to reduce food waste and promote healthy eating in your community.
Overcoming Common Gardening Challenges
Even the most experienced gardeners face challenges from time to time. Here are some common gardening challenges and tips for overcoming them:
Pests and Diseases
Pests and diseases can wreak havoc on your garden. Learn to identify common pests and diseases and take steps to prevent them. Use organic pest control methods whenever possible.
Weeds
Weeds can compete with your plants for nutrients and water. Remove weeds regularly by hand or with a hoe. Mulching can also help to suppress weed growth.
Poor Soil
Poor soil can hinder plant growth. Amend your soil with compost, manure, or other organic matter to improve its fertility and drainage.
Lack of Time
If you are short on time, choose low-maintenance plants and gardening techniques. Consider using self-watering containers or setting up an automated irrigation system.
Gardening as a Lifelong Practice
Gardening is not just a hobby; it’s a lifelong practice that can bring joy, fulfillment, and improved mental well-being for years to come. As you gain experience, you can experiment with new plants, techniques, and garden designs. Embrace the learning process and enjoy the journey.
Continuing Education
There are many resources available to help you continue learning about gardening. Take classes, attend workshops, read books and magazines, and join online gardening communities.
Experimentation
Don’t be afraid to experiment with new plants, techniques, and garden designs. Gardening is a creative process, and there’s always something new to learn.
Adaptation
As your life changes, adapt your gardening practices to fit your needs. You may need to downsize your garden, switch to container gardening, or hire a gardener to help you. The key is to find ways to continue enjoying the benefits of gardening throughout your life.
Conclusion: Sowing the Seeds of a Happier, Healthier You
Gardening is more than just a hobby; it’s a powerful tool for cultivating mental well-being. By connecting with nature, engaging our senses, and nurturing life, we can reap a wealth of benefits for our minds and bodies.
Whether you have a sprawling backyard or a small balcony, there’s a place for gardening in your life. So, grab your gardening gloves, get your hands dirty, and start sowing the seeds of a happier, healthier you. Embrace the journey, and watch as your garden – and your well-being – blossoms.
Remember, the benefits of gardening extend beyond the physical. It’s about nurturing your mind, body, and soul. It’s about connecting with nature, finding peace in the present moment, and cultivating a sense of joy and fulfillment. So, go forth and garden – your mental well-being will thank you for it.


