Elevate Your Harvest: A Comprehensive Guide to Growing Delicious Organic Potatoes in Raised Beds
There’s a certain magic to growing your own food. It’s not just about the delicious, fresh produce; it’s about the connection to the earth, the satisfaction of nurturing a plant from seed to harvest, and the joy of sharing the fruits (or, in this case, the tubers) of your labor. If you’re yearning for that experience and have a penchant for potatoes, then you’re in the right place. This comprehensive guide will walk you through the process of growing vibrant, flavorful, and completely organic potatoes in raised beds. Get ready to dig in – literally!
Why Raised Beds? The Potato Paradise Advantage
Before we delve into the nitty-gritty, let’s talk about why raised beds are a fantastic choice for potato cultivation. They offer a plethora of benefits that can significantly improve your chances of a bountiful harvest:
- Enhanced Drainage: Potatoes are susceptible to rot, and raised beds provide superior drainage compared to in-ground gardens. This is crucial, especially in areas with heavy rainfall or poorly draining soil.
- Improved Soil Control: You have complete control over the soil composition in a raised bed. You can create the ideal soil mix for potatoes, which is crucial for healthy growth and high yields.
- Warmer Soil Temperatures: Raised beds warm up faster in the spring than in-ground gardens, giving you a head start on the growing season. This can be particularly beneficial in cooler climates.
- Easier Weed Management: Weeds are a constant battle for any gardener. Raised beds make weed control much simpler, as you’re working within a confined space.
- Accessibility: Raised beds are ideal for gardeners with mobility issues, as they eliminate the need to bend over excessively.
- Pest and Disease Control: The elevated nature of the beds can help deter some pests and diseases that might otherwise plague your potato plants.
Choosing Your Potatoes: Varieties and Seed Potatoes
The journey begins with choosing the right potato variety. There’s a world of potatoes out there, each with its unique flavor, texture, and growing characteristics. Here are some popular organic options to consider:
- Early Season Varieties: These potatoes mature quickly, offering a harvest in as little as 60-80 days. They’re great for a quick crop and are often harvested as “new potatoes.” Examples include ‘Yukon Gold,’ ‘Irish Cobbler,’ and ‘Red Pontiac.’
- Mid-Season Varieties: These varieties mature in about 80-100 days and offer a good balance of yield and storage potential. Consider ‘Kennebec,’ ‘Fingerling,’ and ‘All Blue.’
- Late Season Varieties: These potatoes take the longest to mature, often 100-120 days, but they typically offer the best storage capabilities. ‘Russet Burbank,’ ‘German Butterball,’ and ‘Carola’ are excellent choices.
Seed Potatoes vs. Grocery Store Potatoes: Always use certified seed potatoes for planting. These are potatoes specifically grown for planting, are disease-free, and will give you the best results. Potatoes from the grocery store may have been treated to prevent sprouting and are not ideal for planting. Plus, using seed potatoes ensures you’re getting the variety you want.
Where to Buy Seed Potatoes: You can find seed potatoes at your local garden center, online from reputable seed companies, or sometimes even at farmers’ markets. Make sure to choose organic seed potatoes to ensure you’re staying true to your organic gardening principles.
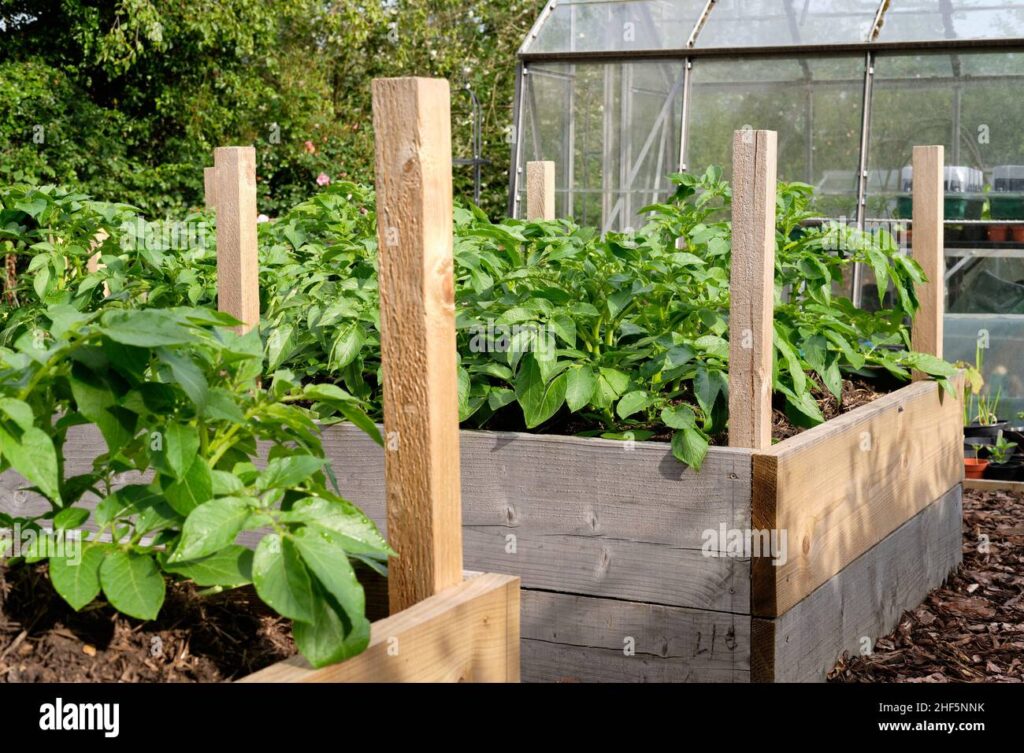
Building Your Raised Beds: Construction and Location
Now, let’s get your raised beds built. Here’s how to approach it:
- Materials: You can build raised beds from various materials, including wood, composite lumber, cinder blocks, or even repurposed materials like old tires (though avoid using treated wood). Untreated wood like cedar, redwood, or cypress is a good choice as they are naturally rot-resistant.
- Dimensions: A standard raised bed is typically 4 feet wide, which allows you to easily reach the center. The length can be whatever suits your space, and the height should be at least 12 inches, but 18-24 inches is ideal for potatoes, giving them plenty of room to grow their tubers.
- Construction: Build the frame of your raised bed, ensuring the corners are square. If using wood, consider adding corner braces for extra support.
- Location, Location, Location: Choose a location that receives at least 6-8 hours of sunlight per day. Potatoes thrive in full sun. Ensure the area has good drainage and is relatively level.
Soil Preparation: The Foundation of a Bountiful Harvest
The soil is the heart of your potato garden. A well-prepared soil mix is essential for optimal potato growth. Here’s what you need to do:
- Soil Composition: Potatoes prefer a slightly acidic soil with a pH between 6.0 and 6.5. The soil should be loose, well-draining, and rich in organic matter. A good mix includes:
- 50% Compost: This provides essential nutrients and improves soil structure.
- 25% Topsoil: Provides a base for the soil mix.
- 25% Well-rotted manure or other organic matter: Adds nutrients and improves drainage.
- Soil Amendments: Before planting, amend the soil with compost, well-rotted manure, and a balanced organic fertilizer. This will provide the nutrients your potatoes need to thrive.
- Avoid Excessive Nitrogen: While potatoes need nutrients, too much nitrogen can lead to lush foliage growth at the expense of tuber production. Use a fertilizer that is balanced or slightly lower in nitrogen.
- Testing Your Soil: Consider getting a soil test to determine your soil’s pH and nutrient levels. This will help you tailor your soil amendments to meet your specific needs.
Planting Your Seed Potatoes: The Process
With your raised beds and soil ready, it’s time to plant. Follow these steps for successful planting:
- Chitting Your Seed Potatoes (Optional): Chitting is the process of pre-sprouting your seed potatoes before planting. This can give you a head start and result in earlier harvests. Place your seed potatoes in a cool, bright location (but not in direct sunlight) for a few weeks before planting. This will encourage sprouts to develop.
- When to Plant: The ideal time to plant potatoes is in the early spring, after the danger of frost has passed. The soil temperature should be at least 45°F (7°C).
- Planting Depth and Spacing: Dig trenches or individual holes in your raised bed that are about 6-8 inches deep. Space your seed potatoes about 12 inches apart within the row and space the rows about 2-3 feet apart.
- Planting the Potatoes: Place the seed potatoes in the trenches or holes, with the eyes (sprouts) facing upwards. Cover them with soil, but do not pack the soil too tightly.
- Watering: Water the soil thoroughly after planting.
Caring for Your Potato Plants: Watering, Weeding, and Hilling
Once your potatoes are in the ground, consistent care is key to a successful harvest. Here’s how to keep your plants happy and healthy:
- Watering: Potatoes need consistent moisture, especially during tuber development. Water deeply and regularly, especially during dry spells. Avoid overwatering, as this can lead to rot. Check the soil moisture by sticking your finger a few inches into the soil. If it feels dry, it’s time to water.
- Weeding: Keep the raised beds free of weeds. Weeds compete with your potato plants for nutrients, water, and sunlight. Weed regularly, ideally by hand or with a hoe, being careful not to disturb the potato plants’ roots.
- Hilling: Hilling is the process of mounding soil around the potato plants as they grow. This is an essential practice for several reasons:
- It encourages the formation of more tubers along the stem.
- It protects the developing tubers from sunlight, which can cause them to turn green and become toxic.
- It helps control weeds.
- Fertilizing: Side-dress your potato plants with a balanced organic fertilizer a few times during the growing season, following the instructions on the fertilizer package.
- Pest and Disease Control: Regularly inspect your plants for pests and diseases. Common potato pests include potato beetles, aphids, and flea beetles. Common diseases include blight and scab. Use organic pest control methods like handpicking pests, introducing beneficial insects, or using insecticidal soap or neem oil. For diseases, ensure good air circulation, avoid overhead watering, and rotate crops to prevent soilborne diseases.
As the plants grow, gradually mound soil around the stems, leaving the top leaves exposed. Repeat this process several times throughout the growing season.
Harvesting Your Potatoes: Timing and Technique
The moment you’ve been waiting for! Harvesting potatoes is a rewarding experience. Here’s how to do it right:
- When to Harvest: The timing of your harvest depends on the variety and your desired potato size. Early season potatoes can be harvested when the plants are flowering, or even earlier for “new potatoes.” Mid- and late-season varieties are typically ready for harvest when the foliage begins to die back, usually about 3-4 months after planting.
- Harvesting Technique: Gently dig around the plants with a garden fork or shovel, being careful not to damage the tubers. Start digging a foot or so away from the plant and work your way in.
- Sorting and Curing: Once you’ve harvested your potatoes, sort them by size and any damage. For long-term storage, it’s important to cure your potatoes. This involves storing them in a cool, dark, and well-ventilated area (around 50-60°F or 10-15°C) for a couple of weeks. This allows the skins to toughen up, which helps them store longer.
- Storing Your Potatoes: Store your cured potatoes in a cool, dark, and humid place, such as a root cellar, basement, or cool pantry. The ideal temperature is around 40°F (4°C), and the humidity should be around 90-95%. Do not store potatoes with apples, as the ethylene gas released by the apples can cause the potatoes to sprout.
Common Problems and Solutions
Even with the best care, you might encounter some challenges. Here are some common problems and how to address them:
- Potato Blight: This fungal disease can devastate your potato crop. Symptoms include dark spots on the leaves and stems. Preventative measures include good air circulation, avoiding overhead watering, and using disease-resistant varieties. If blight appears, remove and destroy infected plants.
- Scab: This disease causes rough, raised lesions on the potato tubers. It’s often caused by alkaline soil. To prevent scab, maintain a slightly acidic soil pH and avoid overwatering.
- Potato Beetles: These pests can quickly defoliate your plants. Handpick the beetles and their larvae, or use organic insecticides like Bacillus thuringiensis (Bt).
- Aphids: These small insects suck sap from the plants. Control them with insecticidal soap or neem oil.
- Green Potatoes: Exposure to sunlight can cause potatoes to turn green and produce solanine, a toxic compound. Hill your plants regularly to protect the tubers from sunlight.
Organic Potato Growing: Staying True to Nature
One of the great joys of growing your own food is the ability to do it organically. Here’s how to keep your potato patch chemical-free:
- Composting: Compost is your best friend! It enriches the soil, provides nutrients, and improves soil structure.
- Crop Rotation: Rotate your crops each year to prevent soilborne diseases and pests. Don’t plant potatoes in the same location year after year.
- Organic Fertilizers: Use organic fertilizers like compost, well-rotted manure, and balanced organic fertilizers.
- Natural Pest Control: Embrace natural pest control methods like handpicking pests, introducing beneficial insects, and using insecticidal soap or neem oil.
- Avoid Synthetic Chemicals: Avoid using synthetic pesticides, herbicides, and fertilizers.
Beyond the Harvest: Enjoying Your Potatoes
The culmination of all your efforts is the delicious reward – your homegrown potatoes! Here are some ideas for enjoying your harvest:
- Classic Dishes: Roast them, mash them, fry them, or boil them. Potatoes are incredibly versatile.
- Experiment with Recipes: Try new potato recipes. There are countless ways to prepare potatoes, from simple side dishes to elaborate meals.
- Preserving Your Harvest: Store your potatoes properly for long-term enjoyment. You can also consider preserving them by canning, freezing, or drying them.
- Share the Bounty: Share your harvest with friends, family, and neighbors. There’s nothing quite like the joy of sharing fresh, homegrown food.
Conclusion: Your Journey to a Bountiful Potato Harvest
Growing organic potatoes in raised beds is a rewarding endeavor that combines the joy of gardening with the satisfaction of eating fresh, delicious food. By following the steps outlined in this guide, you can create a thriving potato patch and enjoy a bountiful harvest. Embrace the process, learn from your experiences, and savor the taste of your own homegrown potatoes. Happy gardening!
Additional Tips for Success
- Companion Planting: Consider companion planting to enhance your potato crop. Some good companion plants include beans, corn, marigolds, and nasturtiums.
- Mulching: Mulch around your potato plants with straw or other organic materials to suppress weeds, retain moisture, and regulate soil temperature.
- Succession Planting: If you live in an area with a long growing season, consider succession planting. Plant a new batch of potatoes every few weeks for a continuous harvest.
- Record Keeping: Keep a gardening journal to track your successes and failures. This will help you learn and improve your potato-growing skills over time.


