Unlocking the Power of Microgreens: Your Quick Start Guide
Ever dreamt of having fresh, vibrant, and incredibly nutritious greens at your fingertips, regardless of the season or your gardening prowess? Well, dream no more! Growing microgreens at home is not only achievable but also surprisingly simple and rewarding. These tiny powerhouses of flavor and nutrition are the perfect addition to any health-conscious individual’s diet, and the best part? You can cultivate them quickly, often within a week or two! This guide will walk you through every step, from selecting the right seeds to harvesting your delicious bounty, ensuring you become a microgreen master in no time.
Why Microgreens? Tiny Plants, Huge Benefits
Before we dive into the how-to, let’s explore the ‘why.’ Why should you even bother with microgreens? The answer is multifaceted, but the core lies in their remarkable nutritional profile. Microgreens are essentially the seedlings of vegetables and herbs, harvested shortly after their first leaves emerge. This early stage of growth is when they are packed with the most concentrated nutrients. Studies have shown that microgreens can contain up to 40 times more nutrients than their mature counterparts. This includes vitamins, minerals, antioxidants, and beneficial enzymes. Essentially, you’re getting a super-charged dose of goodness in every bite!
Beyond their nutritional value, microgreens offer a burst of flavor and texture. They can range from the peppery bite of radish microgreens to the sweet and earthy notes of sunflower shoots. Their delicate textures add a delightful crunch to salads, sandwiches, and other dishes, elevating your culinary creations to a whole new level.
Finally, growing microgreens is incredibly convenient. Unlike traditional gardening, you don’t need a sprawling backyard or extensive knowledge. A small tray, some seeds, and a sunny windowsill or a grow light are often all you need. This makes them the perfect solution for apartment dwellers, busy professionals, and anyone who wants to enjoy fresh produce without the hassle of a full-fledged garden.
Getting Started: Essentials for Microgreen Success
The beauty of growing microgreens is its simplicity. You don’t need a lot of fancy equipment or specialized skills. Here’s a breakdown of the essential supplies you’ll need to get started:
- Seeds: This is the foundation of your microgreen journey! Choose high-quality, non-GMO seeds from reputable suppliers. Some popular and easy-to-grow microgreens include:
- Radish
- Broccoli
- Sunflower
- Pea Shoots
- Mustard
- Arugula
- Growing Trays: You’ll need shallow trays with drainage holes. These can be plastic or biodegradable. Two trays are ideal: one for growing and one without holes to act as a reservoir for bottom watering.
- Growing Medium: The most common and beginner-friendly option is seed-starting mix, a soilless medium that provides excellent drainage and aeration. Coco coir and peat moss are also good choices.
- Watering Can or Spray Bottle: Essential for keeping your microgreens hydrated. A gentle spray is best to avoid damaging the delicate seedlings.
- Light Source: While a sunny windowsill can work, a grow light is highly recommended, especially if you lack sufficient natural light. LED grow lights are energy-efficient and provide the optimal spectrum for plant growth.
- Optional:
- Weight: A small weight, like a seed tray or a book, can be used to help the seeds germinate evenly.
- Ventilation: A small fan can help with air circulation, which can prevent mold and mildew.
Choosing Your Microgreen Seeds: A World of Flavor Awaits
The variety of microgreen seeds available is astounding. The flavor profiles are equally diverse. Consider your taste preferences and the dishes you typically prepare when selecting your seeds. Here are some popular choices and their flavor characteristics:
- Radish: A classic choice, offering a peppery and slightly spicy bite.
- Broccoli: Mildly earthy, with a subtle broccoli flavor.
- Sunflower: Sweet and nutty, with a satisfying crunch.
- Pea Shoots: Sweet and tender, with a delicate pea flavor.
- Mustard: Offers a zesty, mustardy kick.
- Arugula: Peppery and slightly bitter, adding a sophisticated touch.
- Beet: Earthy and sweet.
- Cilantro: A burst of fresh cilantro flavor.
When purchasing seeds, pay attention to the following:
- Seed Quality: Opt for high-quality seeds from a reputable supplier. Check for freshness and ensure the seeds are non-GMO.
- Seed Type: Some seeds are better suited for microgreen cultivation than others. Look for seeds specifically labeled for microgreens.
- Organic Certification: If you prefer organic produce, choose organic seeds.
The Quick & Easy Microgreen Growing Process: Step-by-Step Guide
Now that you have your supplies and seeds, let’s get growing! Here’s a step-by-step guide to cultivating your own microgreens:
- Prepare Your Trays: Fill your growing tray with a seed-starting mix, leaving about an inch of space at the top. Gently level the surface.
- Sow the Seeds: Sprinkle the seeds evenly over the surface of the growing medium. Avoid overcrowding, as this can lead to mold and poor growth. A good rule of thumb is to aim for a density that allows the seedlings to have some space to breathe. The seed packet should give you a good idea of how densely to sow.
- Water Gently: Use a spray bottle to mist the seeds and growing medium thoroughly. The medium should be moist but not waterlogged.
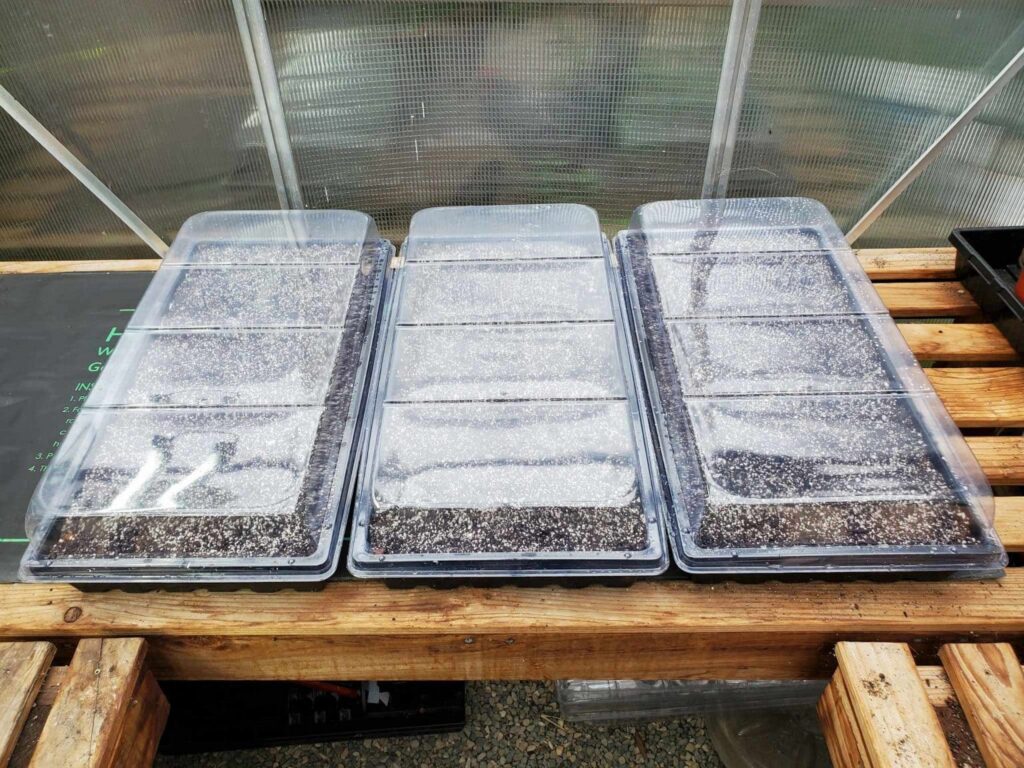
- Cover and Weight (Optional): Some growers cover the tray with another tray or a lid to maintain humidity and promote germination. You can also place a light weight on top of the seeds, such as a tray of the same size or a book. This helps the seeds make better contact with the growing medium and encourages even germination.
- Dark Period (Germination): Place the tray in a dark location for 2-4 days, depending on the seed type. This encourages germination. Check the tray daily and mist with water if the growing medium starts to dry out.
- Introduce Light: Once the seeds have germinated and small roots have emerged, move the tray to a location with bright light. This can be a sunny windowsill or under a grow light.
- Watering: Water your microgreens regularly, typically once or twice a day, depending on the environmental conditions. Bottom watering is often preferred, as it helps to prevent mold and mildew. Place the growing tray in the reservoir tray and add water to the reservoir. The growing medium will absorb the water from the bottom. If you prefer to water from above, use a spray bottle and mist the microgreens gently.
- Monitor Growth: Keep an eye on your microgreens as they grow. They should be ready to harvest in 7-14 days, depending on the seed type.
- Harvesting: Harvest your microgreens when they are about 1-3 inches tall and have developed their first true leaves. Use a pair of clean scissors or a sharp knife to cut the microgreens just above the soil line.
- Enjoy! Rinse your harvested microgreens and enjoy them in salads, sandwiches, smoothies, or as a garnish for your favorite dishes.
Troubleshooting Common Microgreen Problems
Even with the best intentions, you might encounter a few challenges along the way. Here are some common problems and their solutions:
- Mold or Mildew: This is often caused by excessive moisture and poor air circulation. To prevent mold and mildew, ensure adequate drainage, avoid overwatering, and provide good air circulation. A small fan can help with this. If you see mold, remove the affected microgreens immediately and adjust your watering and ventilation practices.
- Leggy Growth: This occurs when the microgreens are not receiving enough light. Move your tray to a brighter location or supplement with a grow light.
- Uneven Germination: Ensure the seeds are evenly distributed and that the growing medium is consistently moist. Consider using a weight during the germination stage to help the seeds make better contact with the soil.
- Slow Growth: This could be due to several factors, including insufficient light, inadequate watering, or nutrient deficiency. Adjust your growing conditions accordingly.
- Seed Hull Issues: Sometimes, seed hulls may stick to the leaves. This is usually harmless. You can gently rinse the microgreens before eating them to remove the hulls.
Maximizing Your Microgreen Yield: Tips and Tricks
Once you’ve mastered the basics, you can take your microgreen growing to the next level with these tips and tricks:
- Succession Planting: To ensure a continuous supply of fresh microgreens, sow new trays every few days or weeks.
- Experiment with Different Varieties: Don’t be afraid to try new seed varieties to discover your favorite flavors and textures.
- Adjust Watering Techniques: Experiment with different watering methods to find what works best for your growing environment.
- Optimize Light Exposure: Pay attention to the light requirements of your chosen microgreens and adjust your light source accordingly.
- Cleanliness is Key: Always use clean trays and tools to prevent the spread of diseases.
- Record Your Results: Keep a journal of your microgreen growing efforts. Note the seed varieties you use, the growing conditions, and the results. This will help you refine your techniques over time.
- Consider a Microgreen Kit: If you’re a beginner, a microgreen kit can be a great way to get started. These kits usually include trays, seeds, growing medium, and instructions.
Beyond the Basics: Innovative Uses for Microgreens
Microgreens are incredibly versatile and can be incorporated into a wide range of dishes. Here are some creative ways to use your home-grown microgreens:
- Salads: Add a vibrant burst of flavor and texture to your salads.
- Sandwiches and Wraps: Elevate your sandwiches and wraps with a nutritious and flavorful addition.
- Smoothies: Blend microgreens into your smoothies for an extra dose of nutrients.
- Soups and Stews: Add microgreens as a garnish to soups and stews.
- Omelets and Frittatas: Sprinkle microgreens on top of your omelets and frittatas.
- Tacos and Burritos: Use microgreens as a topping for your tacos and burritos.
- Pestos and Sauces: Incorporate microgreens into your pestos and sauces for added flavor and nutrition.
- Garnishes: Use microgreens as a garnish for any dish to add a pop of color and flavor.
The Benefits of Growing Microgreens at Home: A Recap
Growing microgreens at home offers a multitude of benefits, making it a worthwhile endeavor for anyone interested in healthy eating and sustainable living. Here’s a quick recap of the key advantages:
- Nutritional Powerhouse: Microgreens are packed with vitamins, minerals, and antioxidants.
- Flavor and Texture: They add a burst of flavor and texture to your dishes.
- Convenience: They are easy to grow, even in small spaces.
- Speed of Growth: They can be harvested in a matter of weeks.
- Cost-Effective: Growing your own microgreens can save you money compared to buying them at the store.
- Sustainable Practice: Growing your own food reduces your carbon footprint.
- Therapeutic: Gardening can be a relaxing and rewarding hobby.
Conclusion: Embark on Your Microgreen Adventure!
Growing microgreens at home is a rewarding and accessible way to enhance your diet and experience the joy of gardening. With a few simple supplies and a little bit of patience, you can cultivate a constant supply of fresh, nutritious, and flavorful greens. So, gather your seeds, prepare your trays, and embark on your microgreen adventure today! You’ll be amazed at how quickly you can transform your kitchen into a vibrant and healthy oasis.
Don’t be afraid to experiment, have fun, and enjoy the process. The world of microgreens is vast and exciting, offering endless possibilities for culinary creativity and healthy living. Happy growing!


