The Unsung Heroes of Compost: Why Native Decomposers Matter
Composting, in its essence, is a natural process of decomposition. It’s a beautiful dance of life and death, where organic matter transforms into a rich, dark, and crumbly substance often referred to as ‘black gold’ by gardeners. But this transformation doesn’t happen on its own; it requires a cast of tiny, yet mighty, actors – the decomposers. These microscopic marvels, including bacteria, fungi, and invertebrates, are the heart and soul of a thriving compost pile. And the best part? You can actively encourage the right ones to move in and set up shop in your compost bin!
Attracting native decomposers is not just about speeding up the composting process; it’s about creating a healthier, more balanced ecosystem within your compost. Native decomposers are perfectly adapted to your local environment. They are the ones who naturally break down the organic materials common in your area. This means a more efficient and effective composting process, leading to a superior end product. Think of it this way: you’re not just making compost; you’re cultivating a community.
Why should you bother attracting native decomposers? Firstly, it’s about efficiency. These decomposers are already present in your soil and environment. They are well-suited to the local climate and the types of organic matter available. Secondly, it’s about sustainability. By relying on native decomposers, you minimize the need for external additives or treatments, making your composting process more environmentally friendly. Finally, it’s about the quality of your compost. A diverse and thriving decomposer community leads to a nutrient-rich compost that is beneficial for your garden.
Understanding the Decomposer Dream Team: Who’s Who in the Compost Pile
Before we delve into the strategies for attracting these crucial players, let’s get to know the main characters in the decomposer drama. The composting process is a complex interplay of various organisms, each playing a unique role. Here are the key players:
Bacteria: The Microscopic Powerhouses
Bacteria are the workhorses of the compost pile. They are the first responders, breaking down easily digestible materials like sugars and proteins. They are incredibly diverse, with different species thriving in different temperature ranges. Some bacteria are thermophilic, meaning they thrive in high temperatures, while others prefer cooler conditions. Their activity generates heat, which is essential for the composting process. Bacteria are the foundation of a healthy compost, the ones doing the heavy lifting in the initial stages of decomposition.
Fungi: The Networkers and Recyclers
Fungi are the unsung heroes of the compost pile. They are responsible for breaking down more complex materials like lignin and cellulose, which are the structural components of plant matter. Fungi, with their network of hyphae, are excellent at penetrating and breaking down tough organic matter. They also play a crucial role in nutrient cycling. Think of them as the recyclers of the compost world. They are also vital for the structure of the compost, helping to create the crumbly texture we all love.
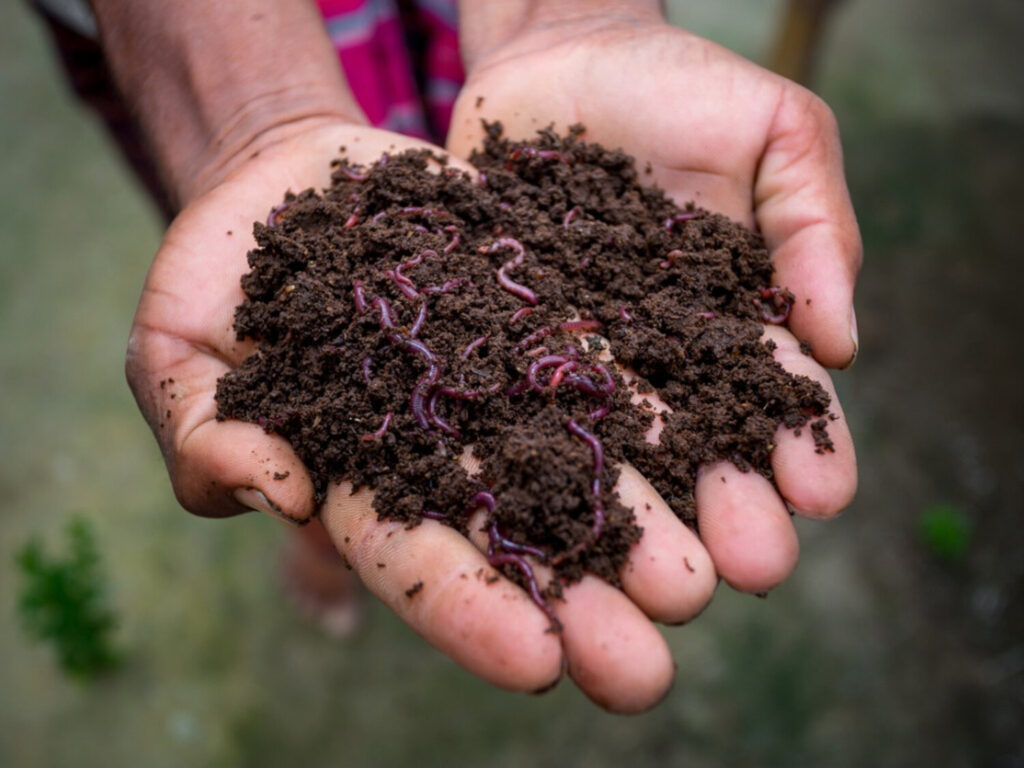
Invertebrates: The Aerators and Mixers
Invertebrates, such as earthworms, insects, and mites, are the aerators and mixers of the compost pile. They tunnel through the compost, creating air pockets that are essential for the aerobic decomposition process. They also help to break down organic matter into smaller pieces, increasing the surface area for microbial activity. Earthworms, in particular, are highly valued for their castings, which are rich in nutrients and beneficial microbes. Invertebrates are the engineers of the compost pile, ensuring that the conditions are right for decomposition to thrive.
Creating a Welcoming Environment: Essential Factors for Attracting Decomposers
Now that we know who’s who, let’s explore the key factors that will make your compost pile a haven for these beneficial organisms. It’s all about creating the right conditions for them to flourish.
1. The Right Ingredients: Balancing the Green and the Brown
The foundation of a successful compost pile is a balanced mix of ‘green’ and ‘brown’ materials. Green materials are nitrogen-rich, such as food scraps, grass clippings, and coffee grounds. Brown materials are carbon-rich, such as dry leaves, shredded paper, and twigs. The ideal ratio is generally around 2:1 or 3:1 brown to green. This balance is crucial for providing the right nutrients for decomposers. Too much green material can lead to a smelly, anaerobic environment, while too much brown material can slow down the decomposition process.
2. Moisture: Keeping it Damp, Not Soggy
Decomposers need moisture to survive and thrive. Think of them as tiny sponges. However, too much water can create an anaerobic environment, which is detrimental to the composting process. The compost pile should be as moist as a wrung-out sponge. If it’s too dry, the decomposers will become inactive. If it’s too wet, it will start to smell and the decomposition process will slow down. Regularly check the moisture levels and add water or dry materials as needed.
3. Aeration: Breathing Life into Your Compost
Aerobic decomposition, which is the process driven by oxygen, is the most efficient and least smelly way to compost. Decomposers need oxygen to break down organic matter. Regularly turning your compost pile is essential for aeration. This introduces oxygen and helps to redistribute moisture and heat. You can turn your pile with a pitchfork or compost turner. Alternatively, you can use a compost tumbler, which makes the turning process much easier.
4. Temperature: Finding the Sweet Spot
Temperature plays a critical role in the composting process. Different decomposers thrive at different temperatures. The ideal temperature range for active composting is between 130°F and 160°F (54°C and 71°C). This temperature range is hot enough to kill weed seeds and pathogens, but not so hot that it kills off the beneficial microbes. Monitoring the temperature of your compost pile can help you optimize the process. You can use a compost thermometer to measure the temperature.
5. Particle Size: Breaking it Down for the Little Guys
The smaller the particle size of the organic matter, the faster it will decompose. Chopping or shredding your materials before adding them to the compost pile increases the surface area for decomposers to work on. This can significantly speed up the composting process. Shredding dry leaves, for example, makes them break down much faster than whole leaves. Consider using a chipper-shredder for woody materials and a lawnmower for grass clippings.
6. Location, Location, Location: Choose Wisely
The location of your compost pile can also impact the decomposer community. Choose a location that is:
- Shady: Protects the pile from drying out too quickly.
- Well-drained: Prevents the pile from becoming waterlogged.
- Accessible: Makes it easy to add materials and turn the pile.
- Near a water source: For easy access to water for moistening the pile.
Consider the prevailing winds. A location sheltered from strong winds can help to retain moisture.
Specific Strategies for Attracting Native Decomposers
Now, let’s get into the specifics. How do you actively attract those native decomposers? Here are some targeted strategies:
1. Source Local Materials
The easiest way to attract native decomposers is to use materials that are readily available in your local environment. This includes:
- Leaves from local trees: These will be populated with decomposers adapted to your climate.
- Grass clippings from your yard: Ensure they haven’t been treated with herbicides or pesticides.
- Food scraps from your kitchen: These provide a steady source of nutrients.
- Yard waste from your neighborhood: Check if your community offers yard waste collection.
By using local materials, you’re essentially introducing the decomposers that are already present in your area.
2. Introduce a Starter Culture
A starter culture is a concentrated source of beneficial microbes that can jumpstart the composting process. You can purchase commercial compost starters, which often contain a blend of bacteria and fungi. Alternatively, you can create your own starter culture by adding a shovelful of finished compost or soil from a healthy garden to your new compost pile. This introduces a diverse community of decomposers.
3. Layering for Success
Layering your compost pile can help to create a balanced environment for decomposers. Start with a layer of brown materials, followed by a layer of green materials. Add a layer of a starter culture or finished compost. Repeat this layering process until your compost pile is full. This layering helps to ensure that the decomposers have access to a variety of nutrients and that the pile is well-aerated.
4. Avoid Harmful Chemicals
Pesticides, herbicides, and other chemicals can harm decomposers. Avoid adding materials that have been treated with these chemicals to your compost pile. This includes grass clippings from lawns that have been treated with herbicides. It’s also important to avoid adding treated wood or pressure-treated lumber to your compost pile.
5. Encourage Invertebrates: Worms and Beyond
Invertebrates, particularly earthworms, are invaluable for a healthy compost pile. To encourage their presence:
- Provide a moist environment: Worms need moisture to survive.
- Offer food: Add food scraps and other organic materials to the compost pile.
- Protect from the sun: Worms prefer a shady environment.
- Avoid disturbing the pile: Let the worms do their work.
You can also purchase red wiggler worms (Eisenia fetida) specifically for composting. They are voracious eaters and excellent decomposers.
6. Be Patient and Observant
Composting is a natural process that takes time. Be patient and observe your compost pile. Monitor the moisture levels, temperature, and the activity of the decomposers. Adjust your practices as needed to create the best environment for decomposition. The more you observe, the better you will become at composting.
Troubleshooting Common Compost Challenges
Even with the best intentions, things can go wrong. Here’s how to address some common composting challenges:
1. The Smell of Rot
A foul odor indicates an anaerobic environment. This is often caused by too much green material, insufficient aeration, or a lack of moisture. To fix this:
- Add more brown materials: This will help to balance the carbon-to-nitrogen ratio.
- Turn the pile: This will introduce oxygen and improve aeration.
- Add water: If the pile is dry, add water to maintain the moisture level.
2. Slow Decomposition
Slow decomposition can be caused by several factors, including:
- Insufficient moisture: Add water to the pile.
- Lack of aeration: Turn the pile regularly.
- Imbalance of green and brown materials: Adjust the ratio.
- Cold temperatures: Wait for warmer weather or insulate the pile.
- Small particle size: Chop or shred materials.
3. Pests and Critters
Pests can sometimes be attracted to compost piles. To minimize pest problems:
- Bury food scraps: This reduces odors and discourages pests.
- Cover the pile: Use a lid or tarp to keep out pests.
- Avoid meat and dairy products: These can attract rodents and other pests.
- Maintain proper aeration: A well-aerated pile is less attractive to pests.
The Rewards of Attracting Native Decomposers
The benefits of attracting native decomposers extend far beyond just making compost. It’s a holistic approach to gardening and environmental stewardship. Here’s a glimpse of the rewards:
1. Superior Compost Quality
A diverse and thriving decomposer community results in a nutrient-rich compost that is packed with beneficial microbes. This compost will:
- Improve soil structure: Making it easier for roots to grow.
- Increase water retention: Reducing the need for watering.
- Enhance nutrient availability: Providing essential nutrients to plants.
- Suppress plant diseases: Promoting healthy plant growth.
2. Reduced Waste and Environmental Impact
Composting reduces the amount of waste that ends up in landfills. It also reduces the need for chemical fertilizers and pesticides, which can harm the environment. By composting, you are:
- Conserving resources: Reusing organic materials.
- Reducing greenhouse gas emissions: From landfills.
- Promoting a circular economy: Closing the loop on waste.
3. A Thriving Garden Ecosystem
Composting creates a healthy ecosystem in your garden. The compost you create will:
- Attract beneficial insects: Providing pollination and pest control.
- Support a diverse community of soil organisms: Creating a healthy soil food web.
- Promote biodiversity: Supporting a variety of plant and animal life.
4. A Sustainable Gardening Practice
Composting is a sustainable gardening practice that benefits both the environment and your garden. It is a way to:
- Reduce your carbon footprint: By reducing waste and using less fertilizer.
- Improve your soil health: Creating a healthy and thriving garden.
- Connect with nature: By understanding and working with natural processes.
Conclusion: Cultivating a Compost Community
Attracting native decomposers is a rewarding endeavor that transforms your compost pile into a dynamic ecosystem. By understanding the roles of bacteria, fungi, and invertebrates, and by providing the right conditions, you can create a thriving compost community that will reward you with superior compost and a healthier garden. Embrace the power of nature, and watch your compost pile flourish! It’s a journey of discovery, a testament to the interconnectedness of life, and a simple yet profound way to enrich both your garden and the planet.
So, start today! Gather your ingredients, build your pile, and let the decomposers do their work. You’ll be amazed at the results!


